Steps

  1. Go to our Free Cookie Consent Solution page to start creating the Cookie Consent code that's necessary to show the notice banner on Swipe Pages.

  2. Log in to your Swipe Pages account.

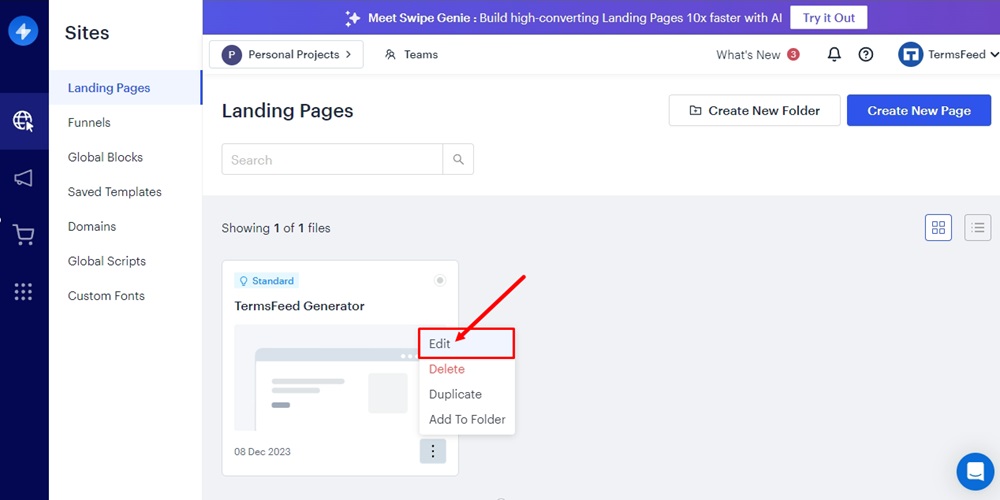
  3. Click Edit on your landing page:

    TermsFeed Swipe Pages: Landing page Edit option

  4. Click on the Landing Page you want to edit:

    TermsFeed Swipe Pages: Landing page Edit option - Landing Page

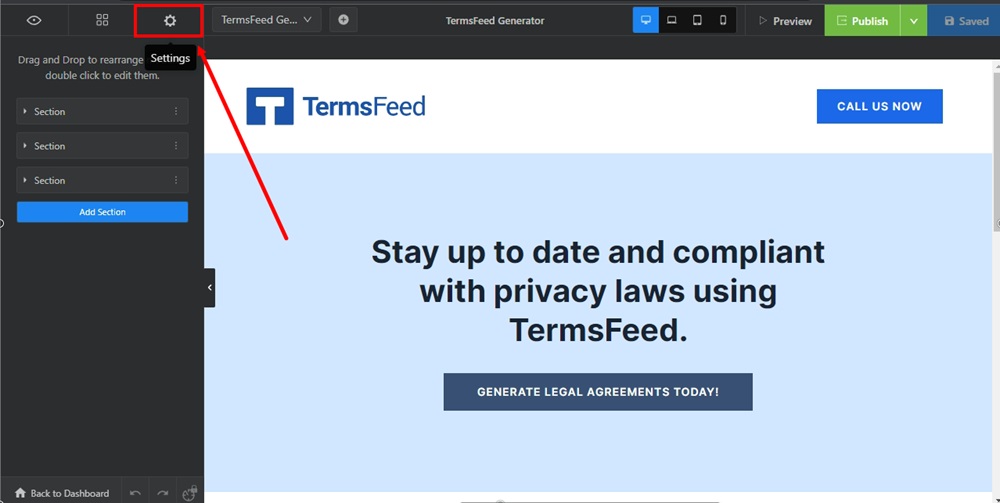
  5. Go to Settings (the gear icon):

    TermsFeed Swipe Pages: Landing page Edit - Settings

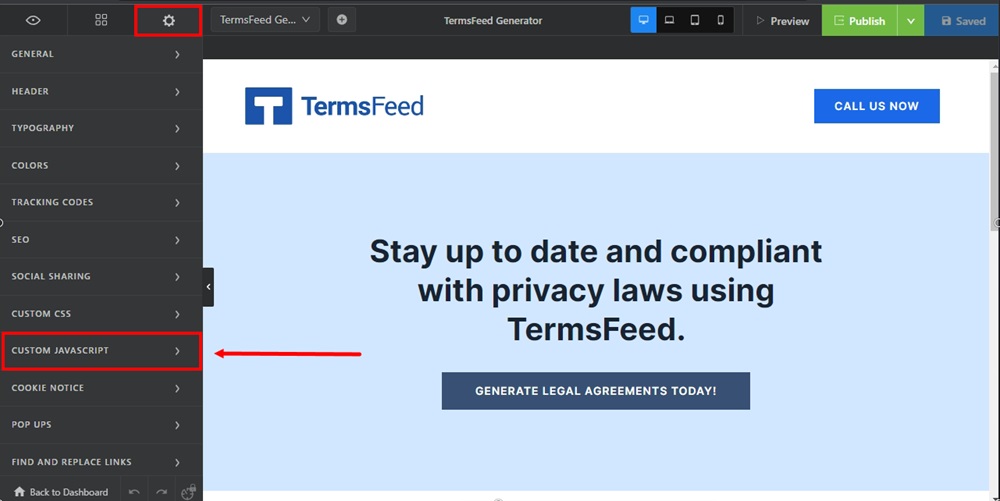
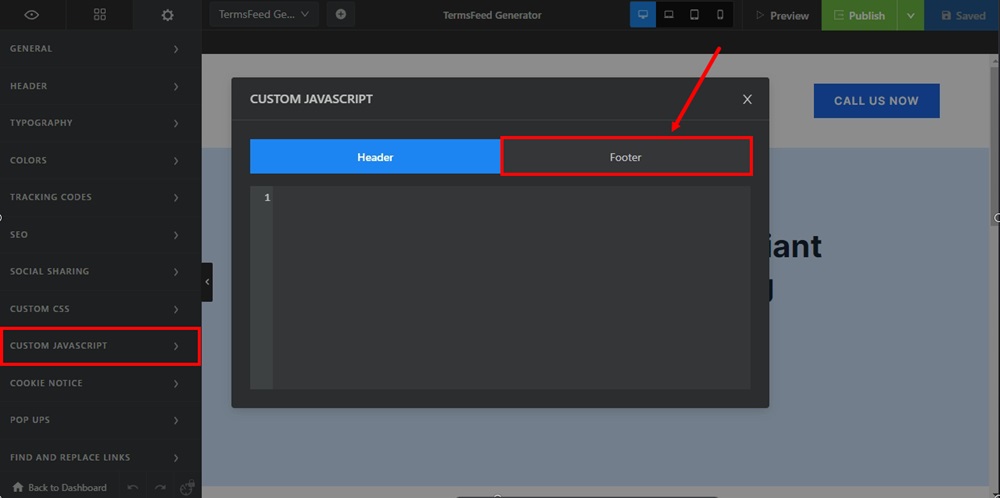
  6. From the Settings list, find the Custom Javascript and click on it:

    TermsFeed Swipe Pages: Landing page Edit - Settings - Custom Javascript

  7. A new window will open. Switch to the Footer tab:

    TermsFeed Swipe Pages: Landing page Edit - Settings - Custom Javascript - new window - Footer tab

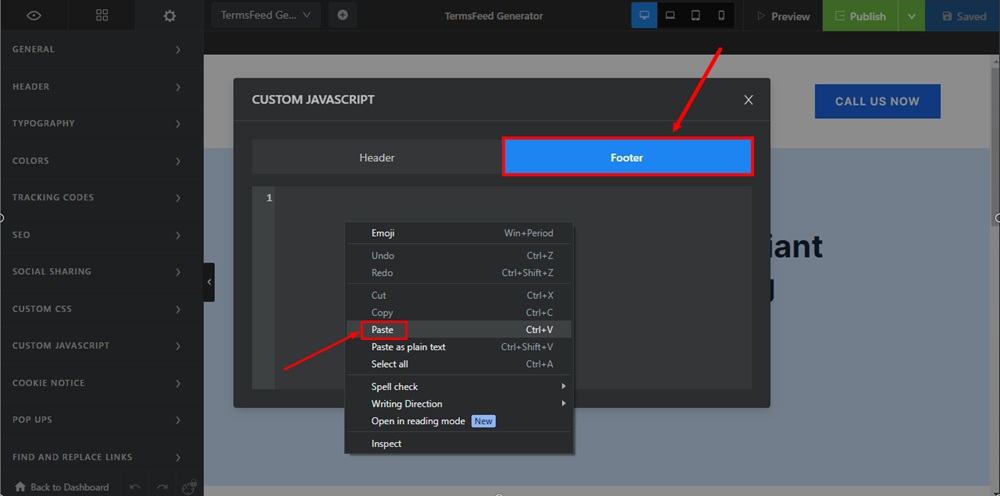
  8. Paste the generated Cookie Consent code in the Footer tab field:

    TermsFeed Swipe Pages: Landing page Edit - Settings - Custom Javascript - new window - Footer tab - paste

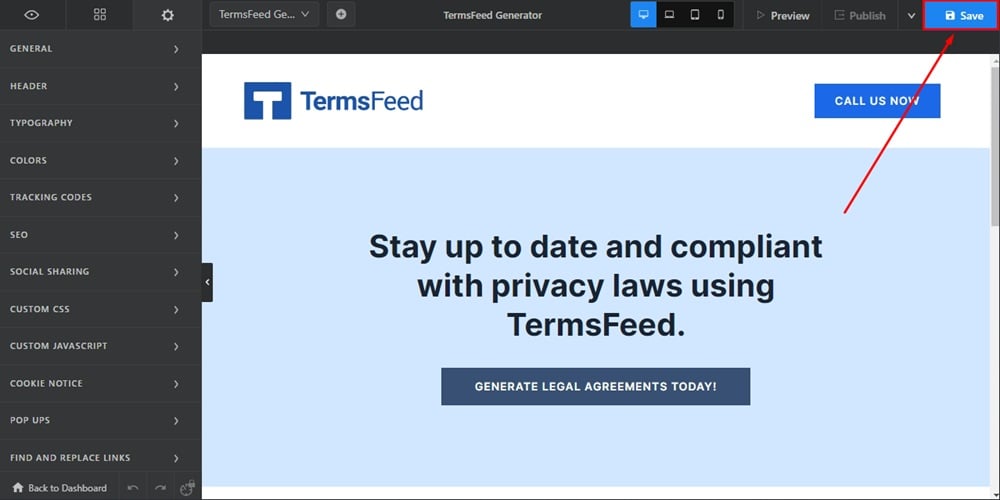
  9. When done, close the window. Click Save in the upper right corner:
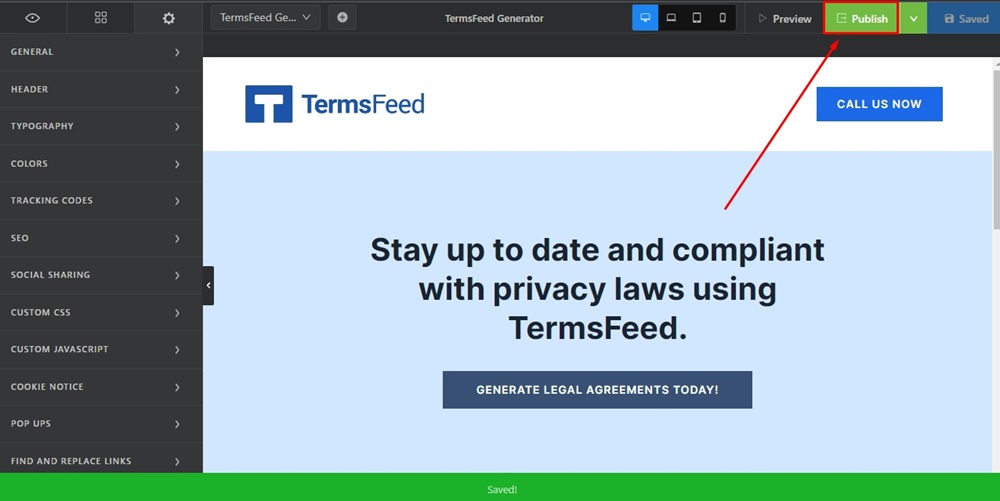
    TermsFeed Swipe Pages: Landing page Edit - Settings - Custom Javascript - Save

  10. Click Publish:

    TermsFeed Swipe Pages: Landing page Edit - Settings - Custom Javascript - Saved - Publish

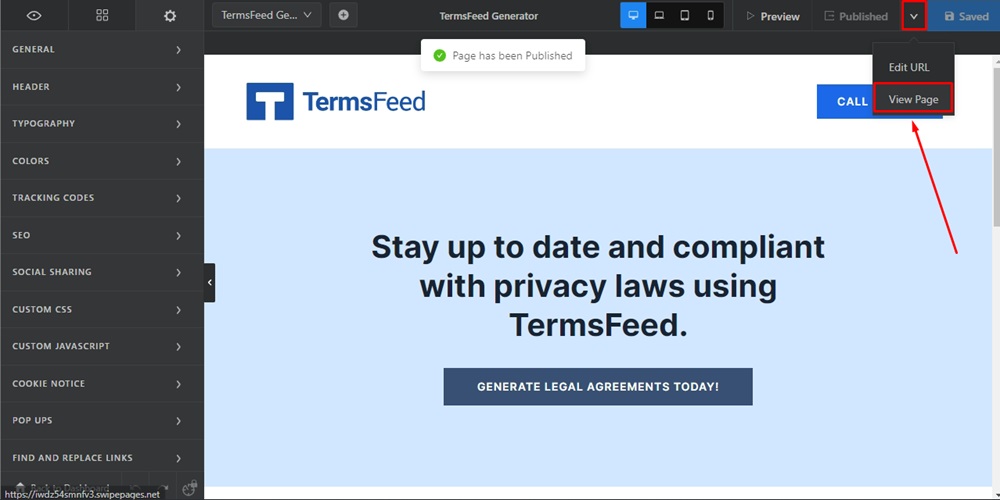
  11. Next to the Publish option, open the dropdown menu and click on View Page:

    TermsFeed Swipe Pages: Landing page Edit - Settings - Custom Javascript - Saved - Publish - View Page

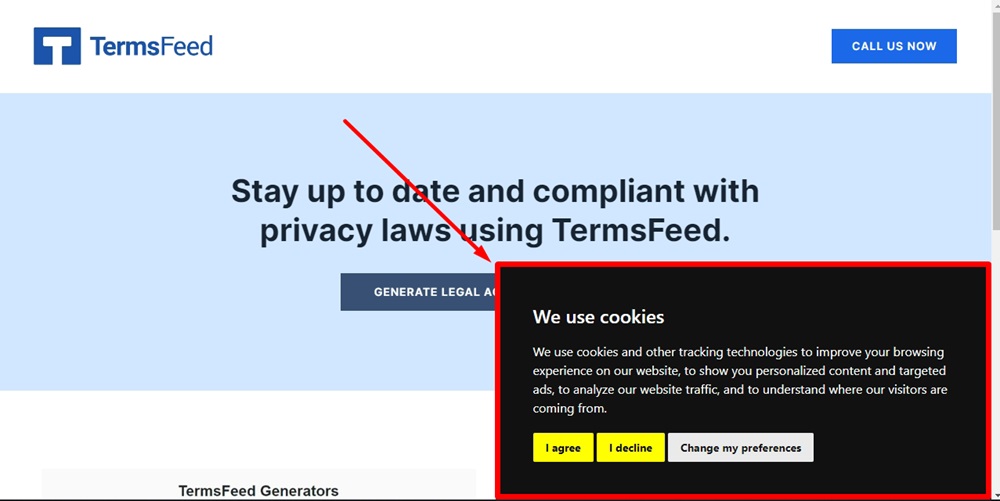
  12. The Cookie Consent Notice Banner is displayed on the live landing page:

    TermsFeed Swipe Pages: Landing page - Published - View Page - The Cookie Consent Notice Banner displayed