Steps
-
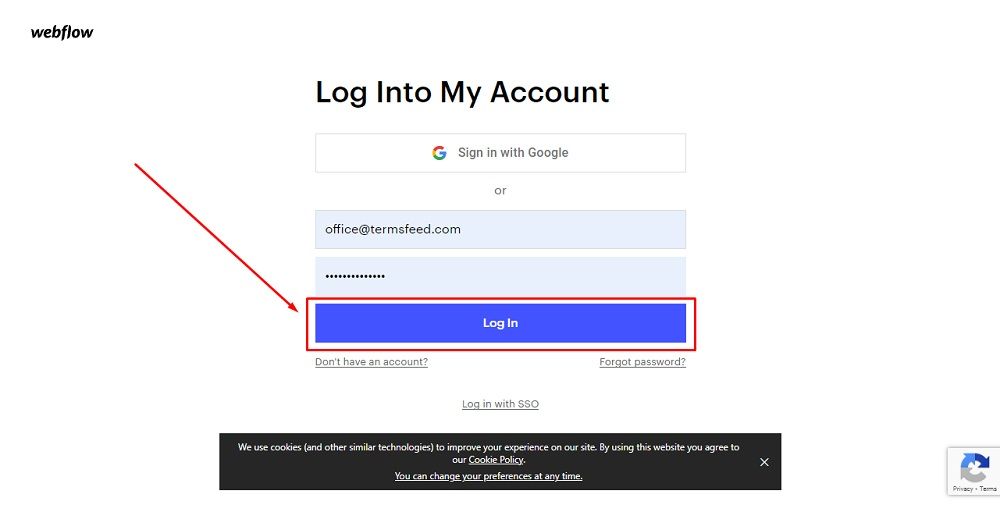
Log in to your Webflow account:
-
From Webflow's dashboard, click View Site:

-
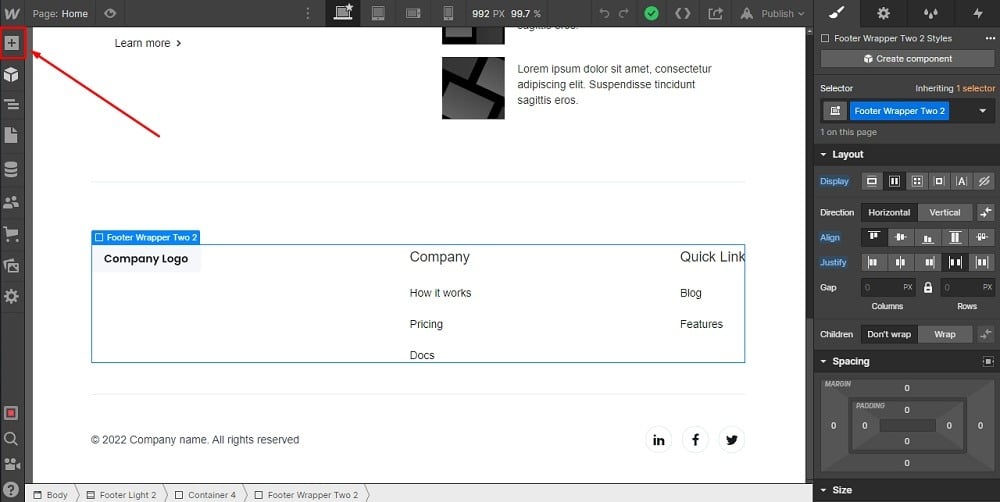
Scroll down to your website's footer and click on the Plus (+) button to add a new element:
-
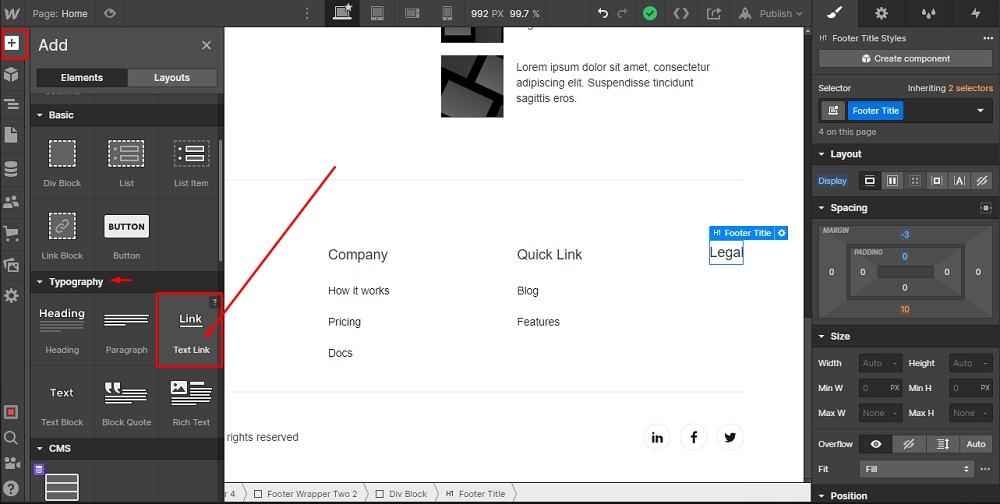
To add the legal links in the footer, go to the Add section and choose Link under Typography elements. Drag and drop it in the same Div Block below the heading you've added previously:
-
Double click on Text Link and replace it with the name of your policy. For example, "Return and Refund Policy":
-
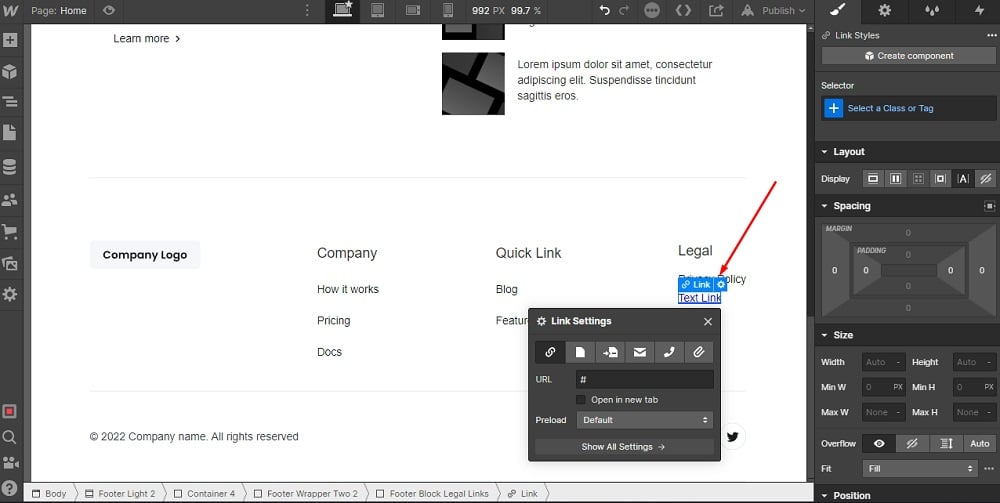
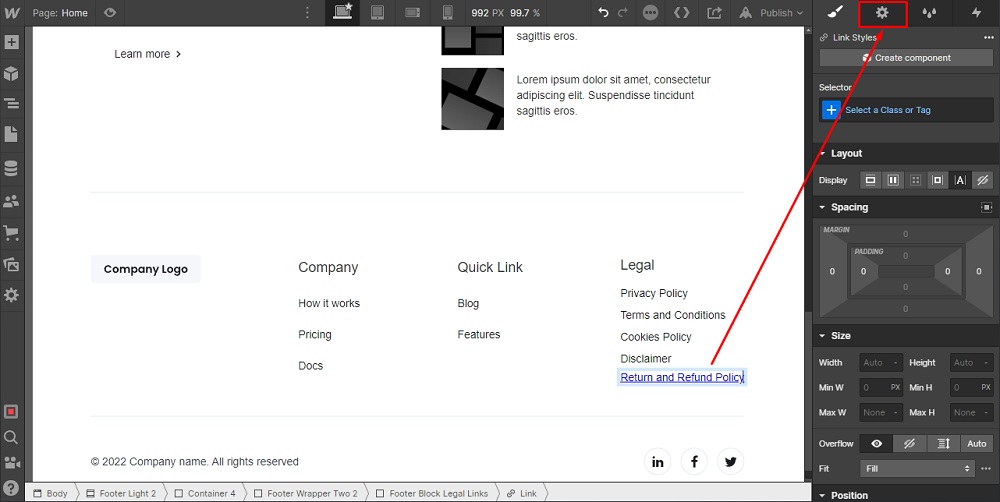
To add the URL to the Return and Refund Policy page, go to the Gear icon on the right side. Add the link in the URL field under Link Settings:
-
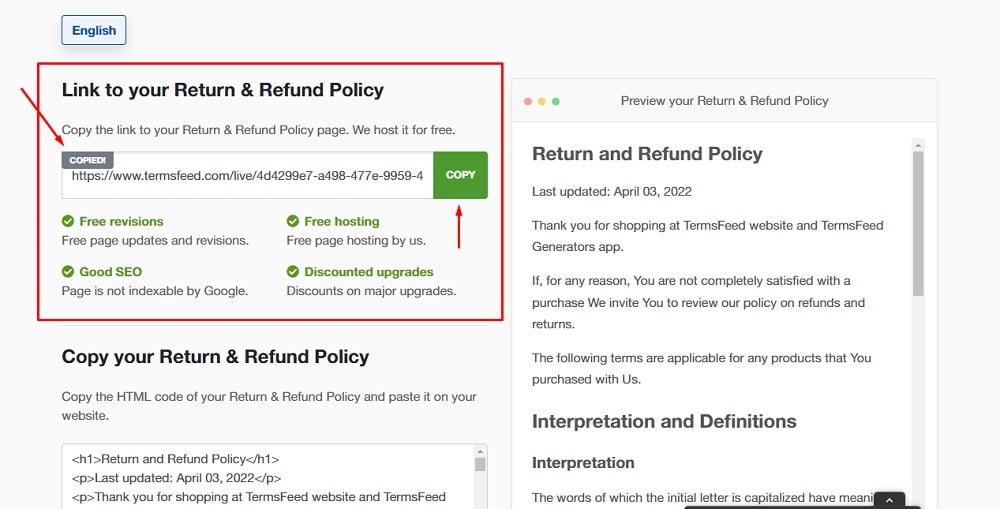
Go to the TermsFeed Return and Refund Policy Generator to create the policy and get the hosted Return & Refund Policy URL webpage.
Once you have the Return and Refund Policy created by TermsFeed, let's get the policy text. In the Link to your Return and Refund Policy section, click on the green Copy button:
-
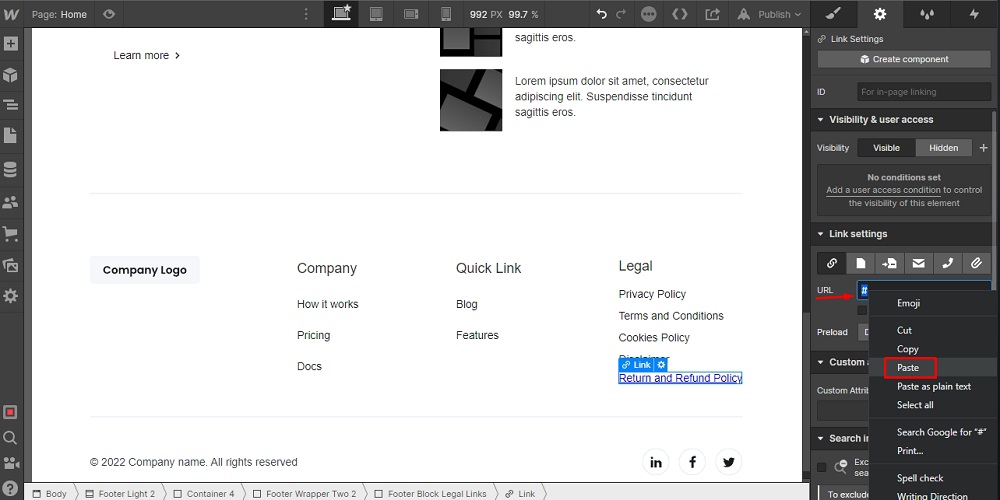
Paste the Return and Refund Policy URL in the URL field:
-
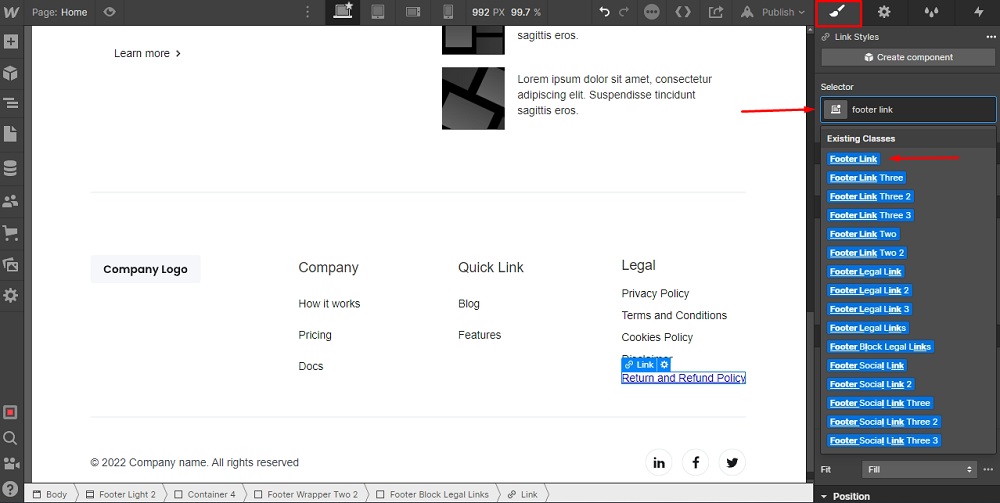
Style your footer link as you wish with the Brush option on the right side:
-
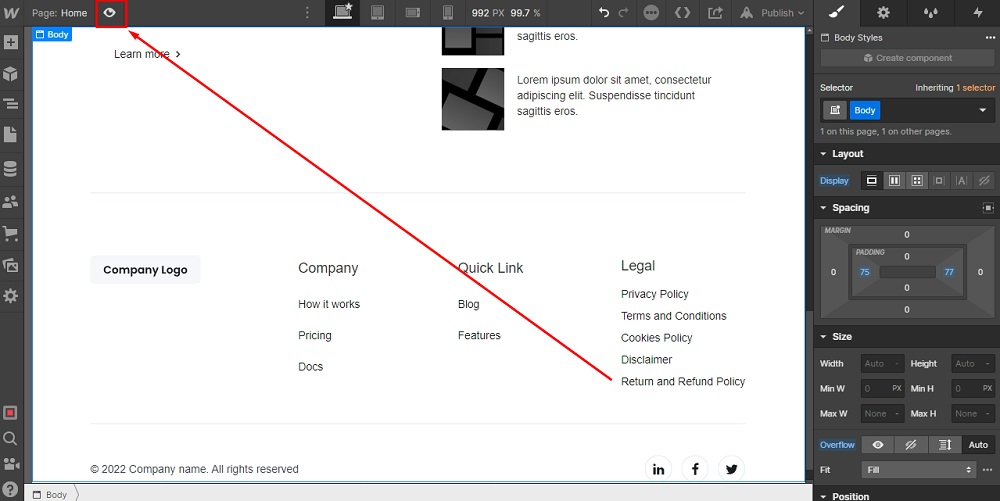
To preview the changes, click on the Eye icon at the top menu:


You're done.


