Steps
-
Visit our "I Agree" Checkbox free tool page.
-
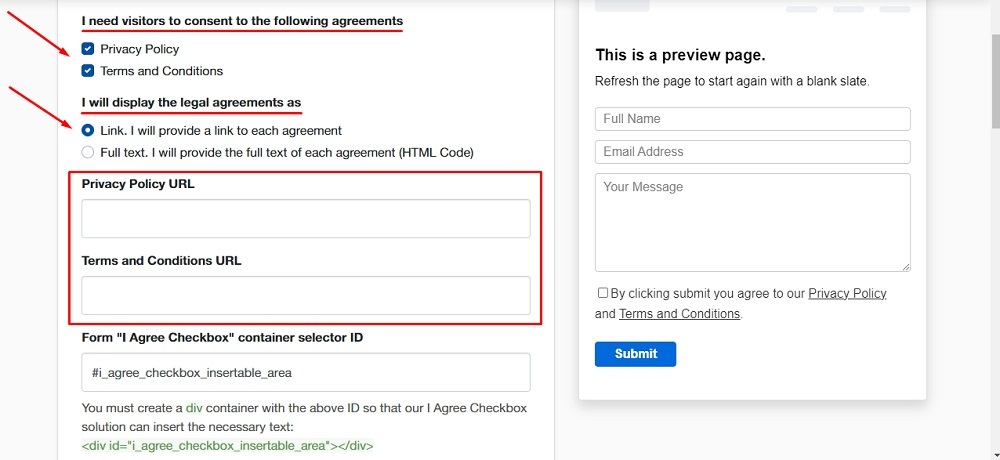
At Step 1, start adjusting the settings. Choose the agreements you want the users to agree to, and how to display them when they submit the form (ie. show the policies as a link or full text of the actual policy):
-
If you want to display links to your legal links instead of showing the full text, add the links to your legal agreements.
-
To get the Privacy Policy URL link, go to the TermsFeed Privacy Policy Generator to create a Privacy Policy and get the hosted Privacy Policy URL.
Once you have the Privacy Policy created by TermsFeed, click Copy from the Link to your Privacy Policy section to copy the URL:

-
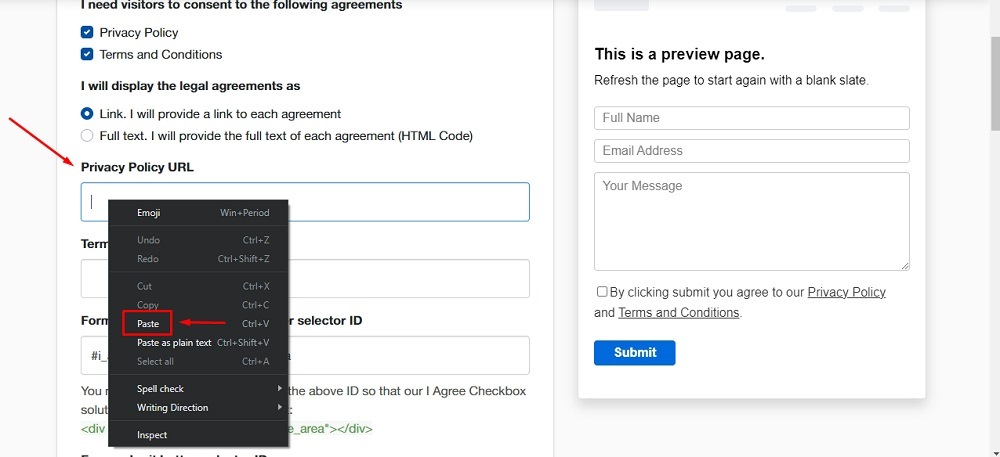
Paste the Privacy Policy URL in the Privacy Policy URL field of the "I Agree Checkbox" builder:
-
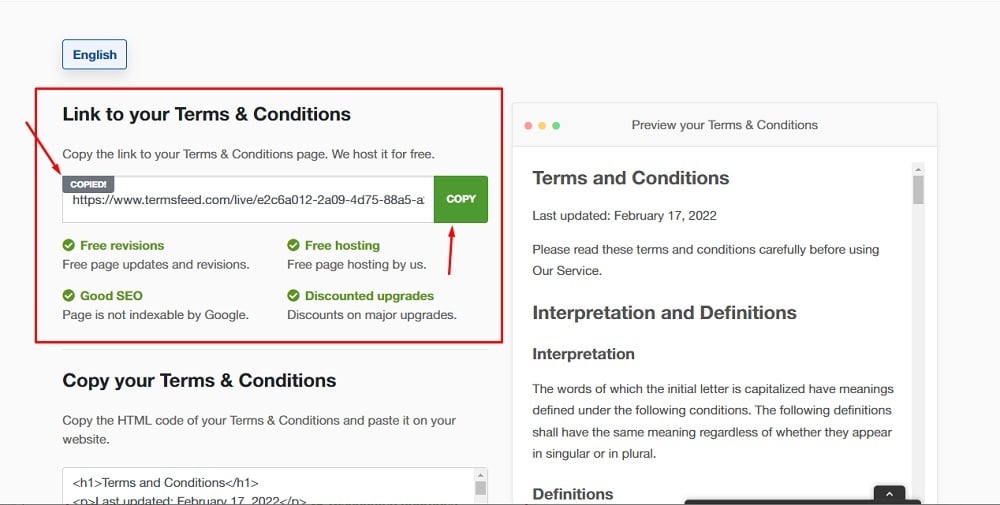
In order to get the Terms and Conditions URL link, go to the TermsFeed Terms and Conditions Generator to create a Terms and Conditions agreement and get the hosted Terms and Conditions URL.
Once you have the Terms and Conditions created by TermsFeed, click Copy from the Link to your Terms & Conditions section to copy the URL:
-
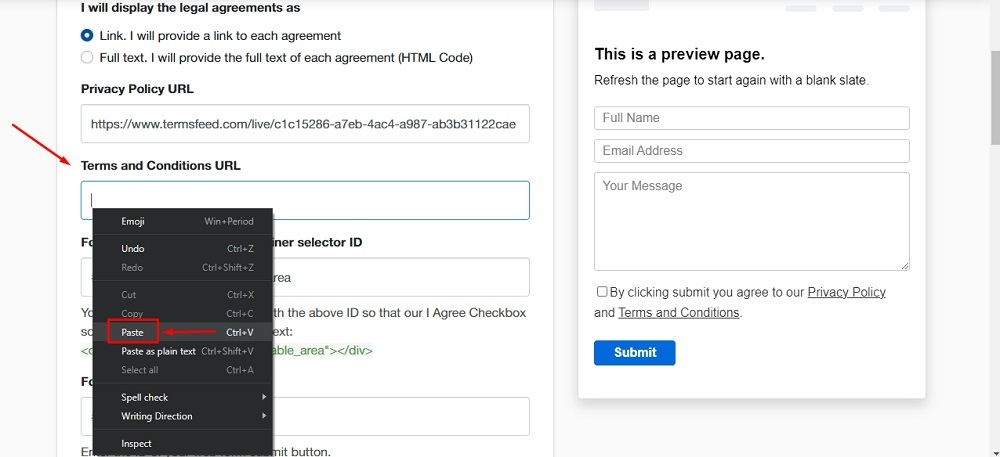
Paste the Terms and Conditions URL in the Terms and Conditions URL field of the "I Agree Checkbox" builder:
-
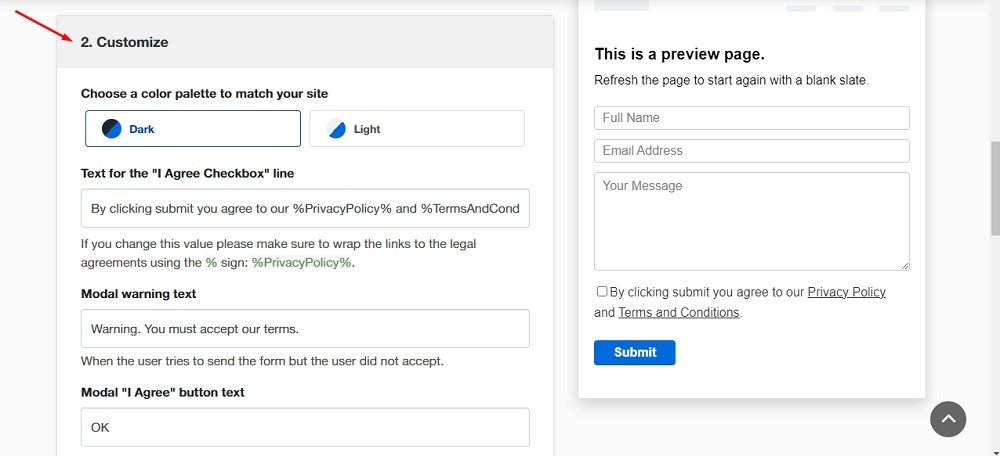
At Step 2, start customizing your solution by changing the text and the color palette:
-
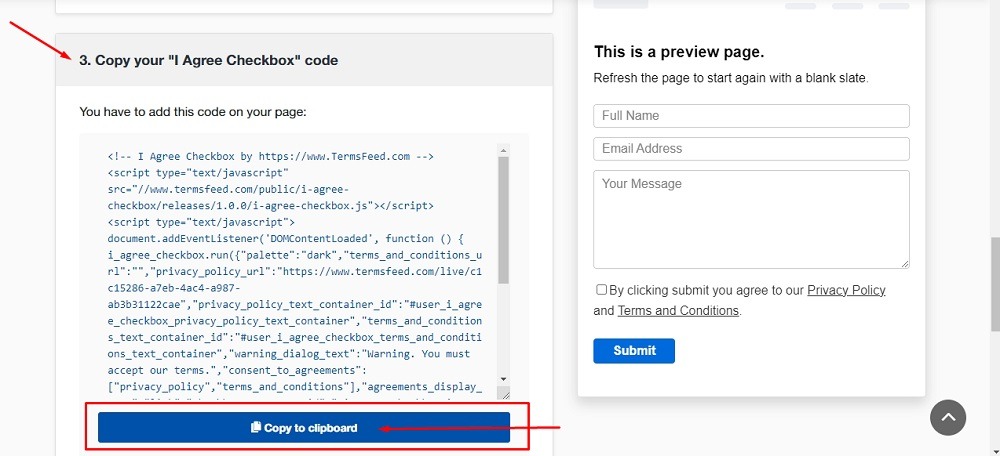
Copy the generated "I Agree Checkbox" code:


In the rest of the steps, we'll use an example of a website powered by WordPress with a plugin to show a contact form.
If your website uses a different CMS, the steps remain relatively the same: Edit your theme/website and add the generated code near the form where you want the "I Agree" checkbox to appear.
-
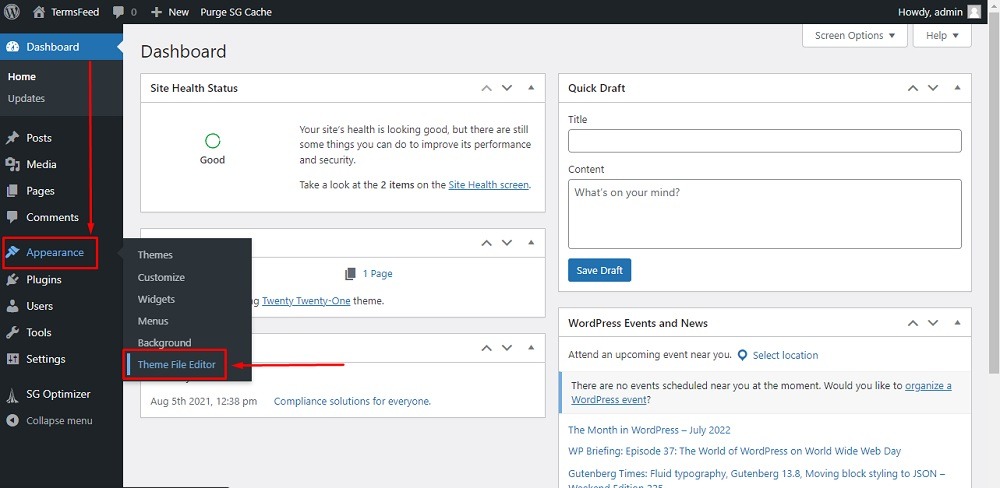
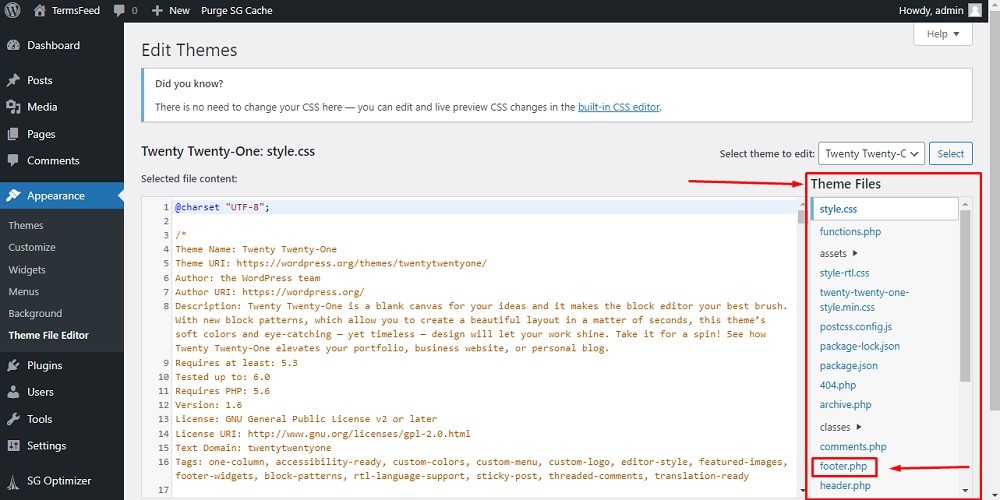
Go to your website. If you use WordPress, go to Appearance and click on Theme File Editor:
-
In the Edit Themes section from Theme files on the right side, choose footer.php:
-
Scroll down up to the
</body>. Before this HTML tag, paste the generated code of the "I Agree" Checkbox tool: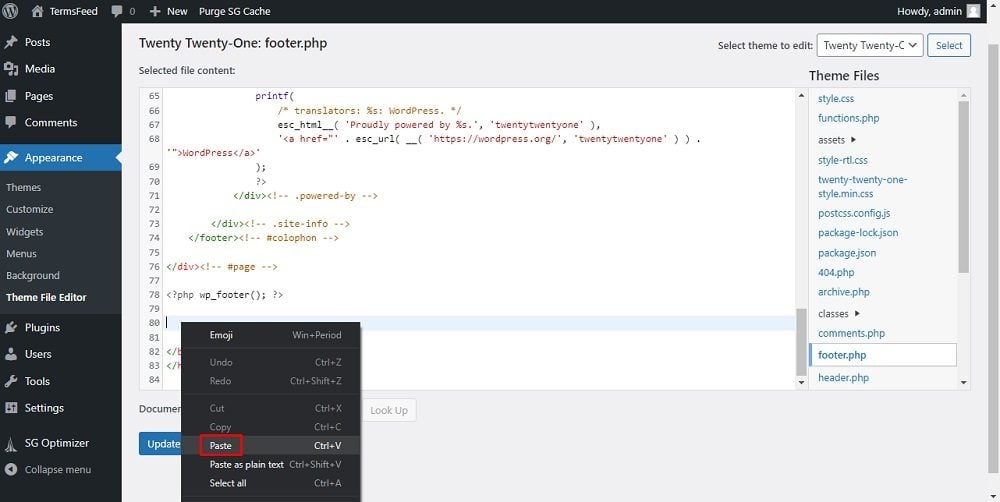
-
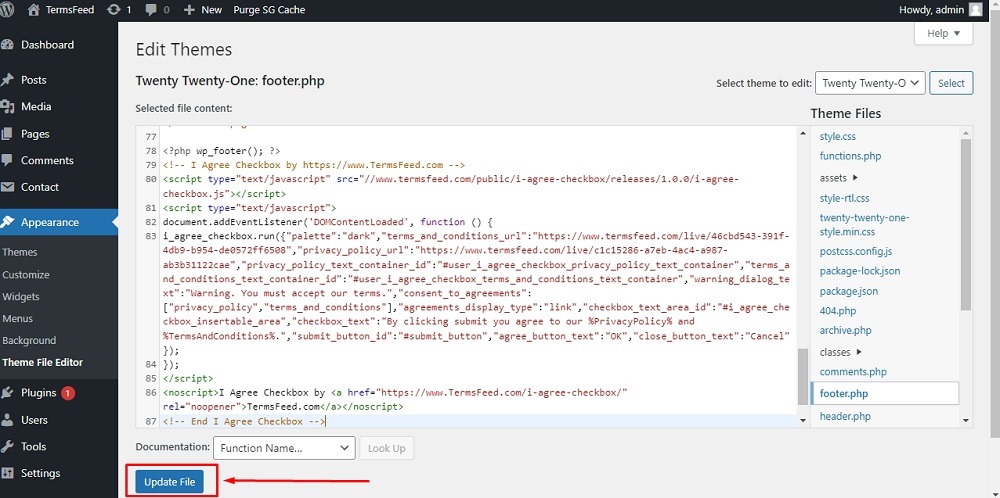
Click on Update file:
-
In order for the "I Agree" Checkbox tool to insert the necessary dialog, you'll need to create an additional
<div>container with the ID selector you've added in Step 1.For example, we'll use the
#i_agree_checkbox_insertable_areaID which is the default our tool uses. -
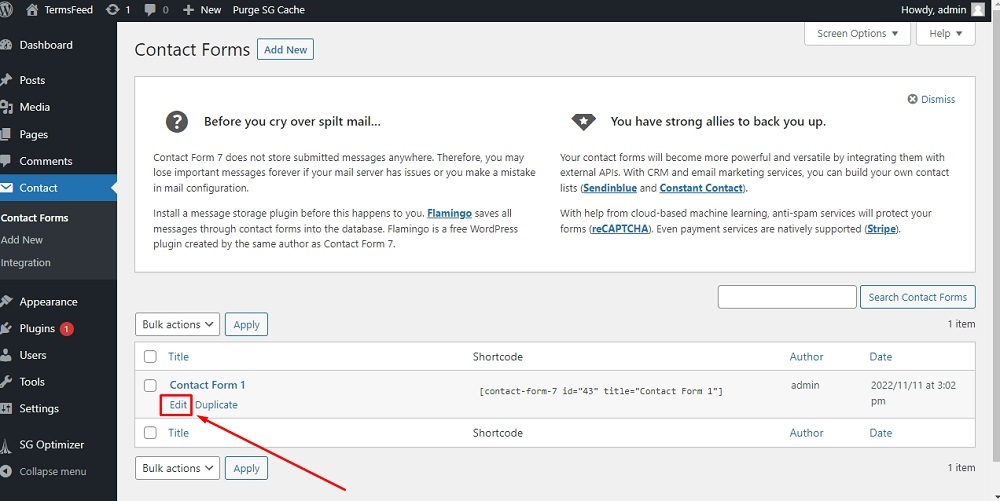
As we're using WordPress and a contact form plugin for example purposes, go to Contact and choose Contact Forms:

-
When the Contact Forms editor opens, choose the Edit option of your form where you'd like to add the "I Agree" Checkbox dialog:
-
The Edit Contact Form editor will open. The ID selector in
<div>container needs to be added before the form "Submit" button: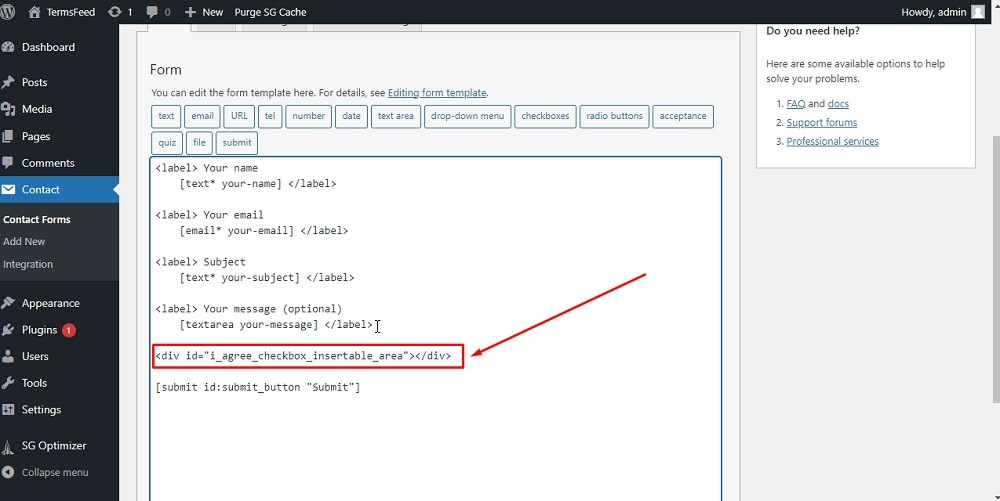
-
Click Save:

-
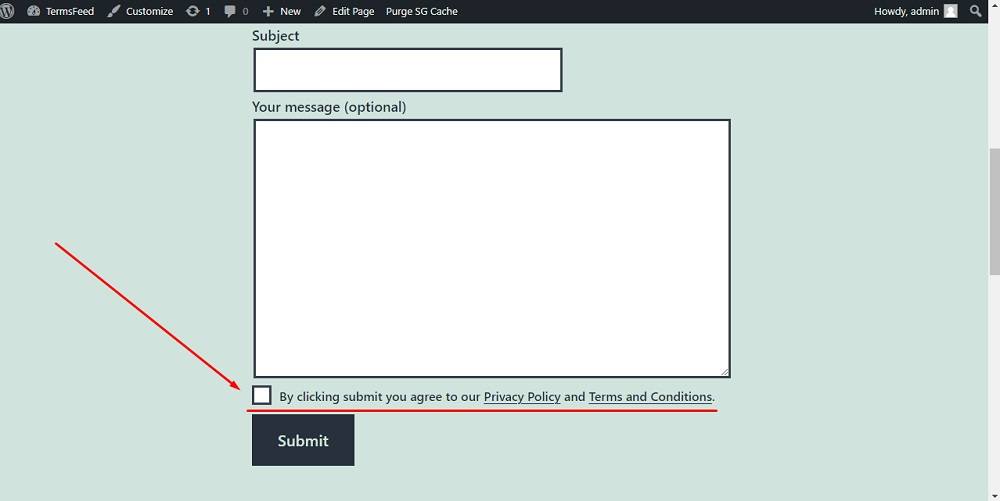
Go to the page of your website where the form is shown. The text generated by the "I Agree" Checkbox tool should appear above the "Submit" form:
-
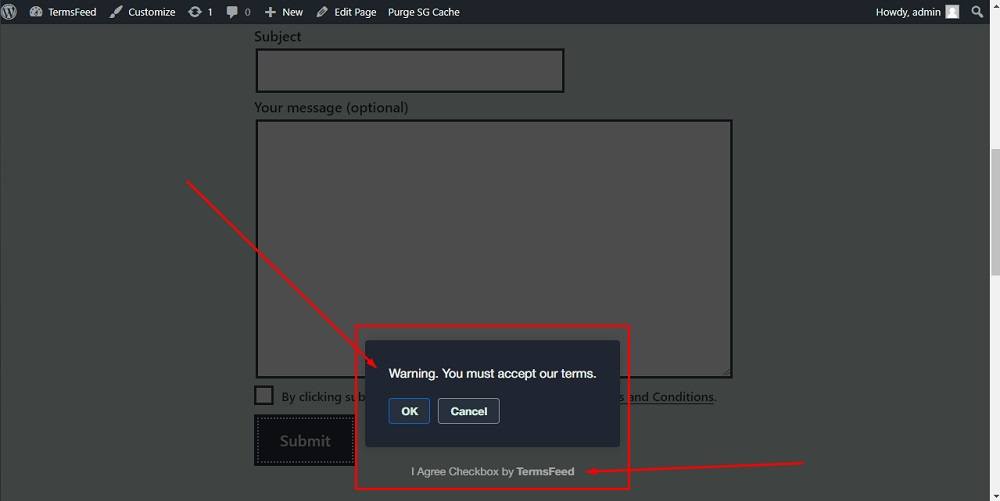
If the user doesn't agree to the linked policies, a warning message will be shown: