Steps

  1. Log in to your Able Commerce website.

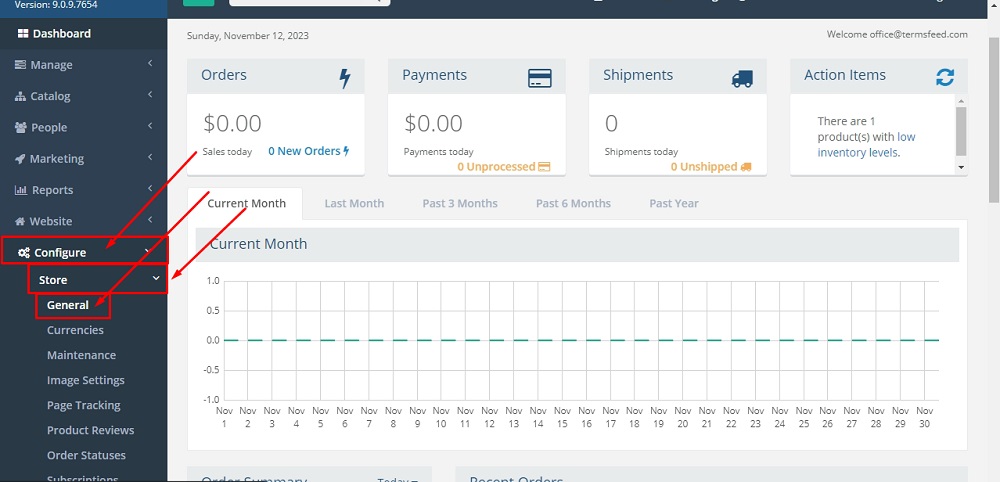
  2. Go to Configure > Store > General:

    TermsFeed Able Commerce: Dashboard - Configure - Store - General option selected

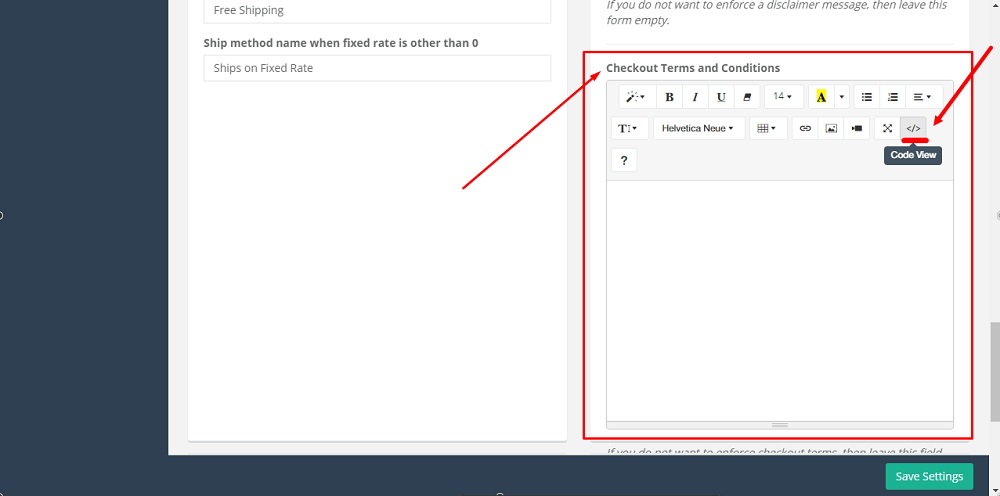
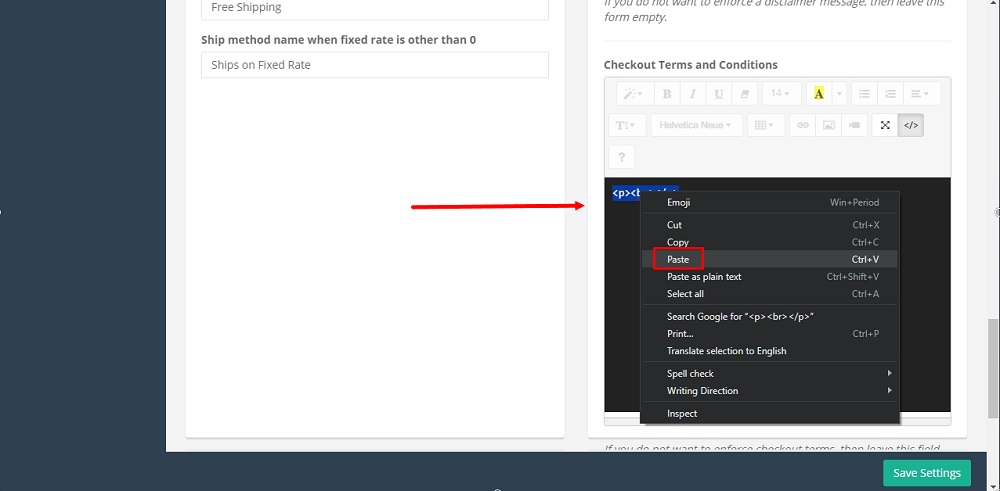
  3. Scroll to Other Settings and select the Code View icon in the Checkout Terms and Conditions editor:

    TermsFeed Able Commerce: General - Other Settings - Checkout Terms and Conditions - Code View icon selected

  4. Add text of your Terms and Conditions.

    If you do not have a Terms and Conditions, you can use our Terms and Conditions Generator and create it within minutes.

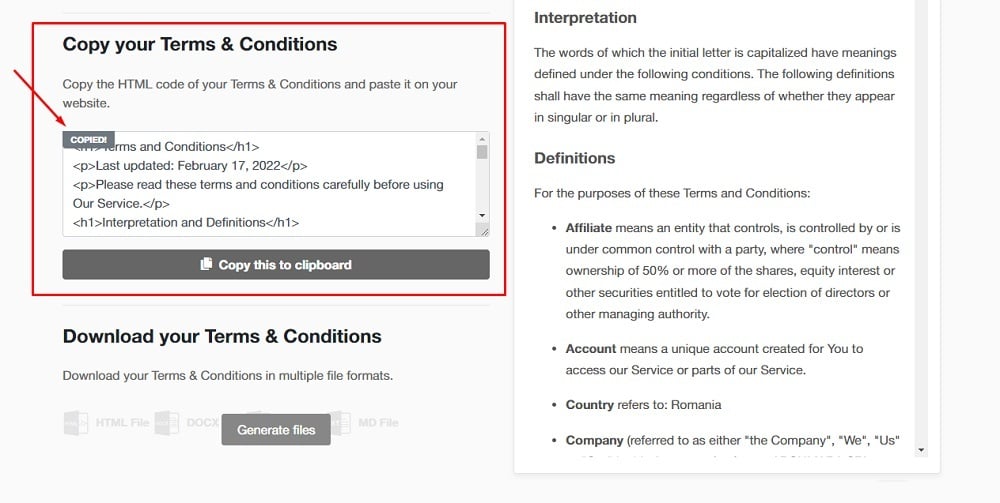
    Once you have the Terms and Conditions created by TermsFeed, let's get the agreement text. Under the Copy your Terms and Conditions section, click on Copy this to clipboard:

    TermsFeed App: Terms and Conditions Download page - Copy your Terms and Conditions section highlighted

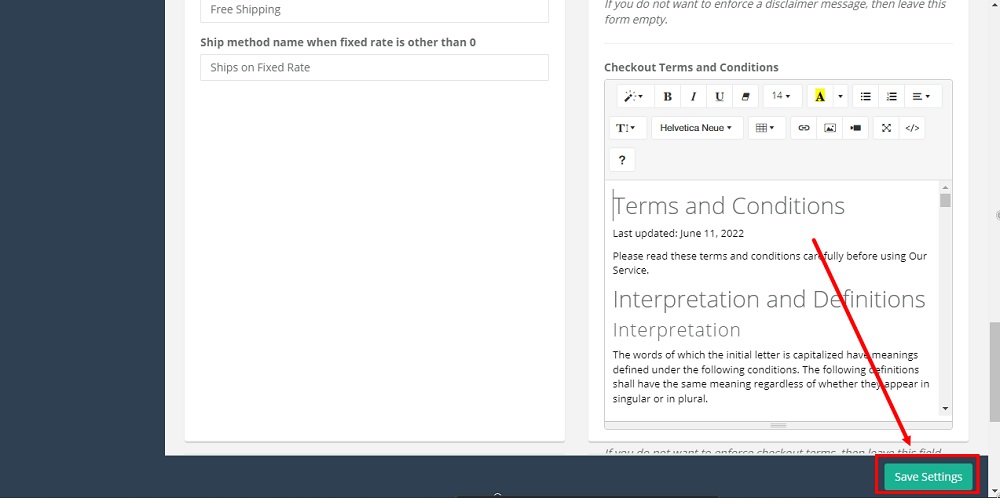
  5. Paste the Terms and Conditions in the code editor:

    TermsFeed Able Commerce: General - Other Settings - Checkout Terms and Conditions - Code View - Paste selected

  6. Click Save Settings at the bottom:

    TermsFeed Able Commerce: General - Other Settings - Checkout Terms and Conditions - added - Save Settings selected

  7. Go to the Storefront to preview changes:

    TermsFeed Able Commerce: General - Other Settings - Checkout Terms and Conditions - added - Save Settings - Storefront selected

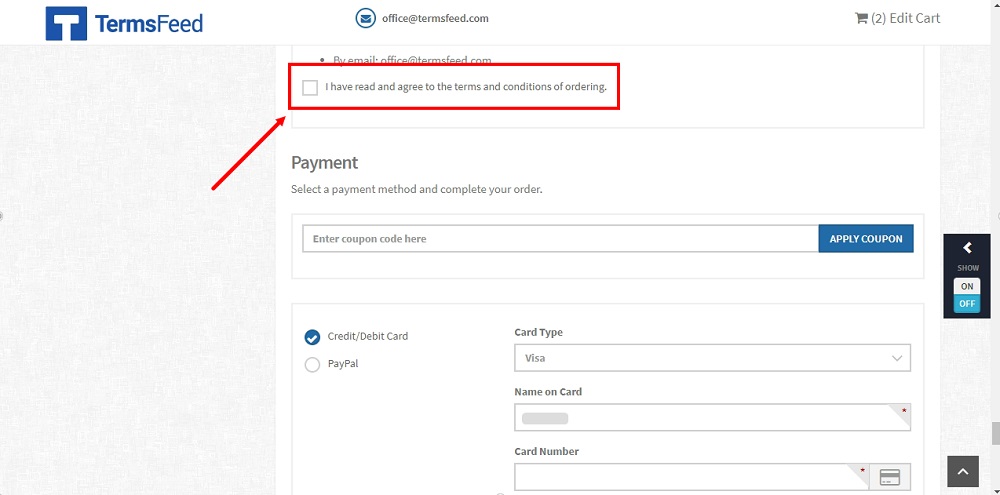
  8. The full text of your Terms and Conditions is added and displayed on step 3 of the checkout page:

    TermsFeed Able Commerce: Checkout - step 3 - payment - the Terms and Conditions full text displayed

  9. The customer consent checkbox is displayed at the end of the Terms and Conditions text, before the payment step on the Able Commerce checkout page:

    TermsFeed Able Commerce: Checkout - step 3 - payment - the Terms and Conditions full text with the I Agree checkbox displayed

You're done!