Steps
-
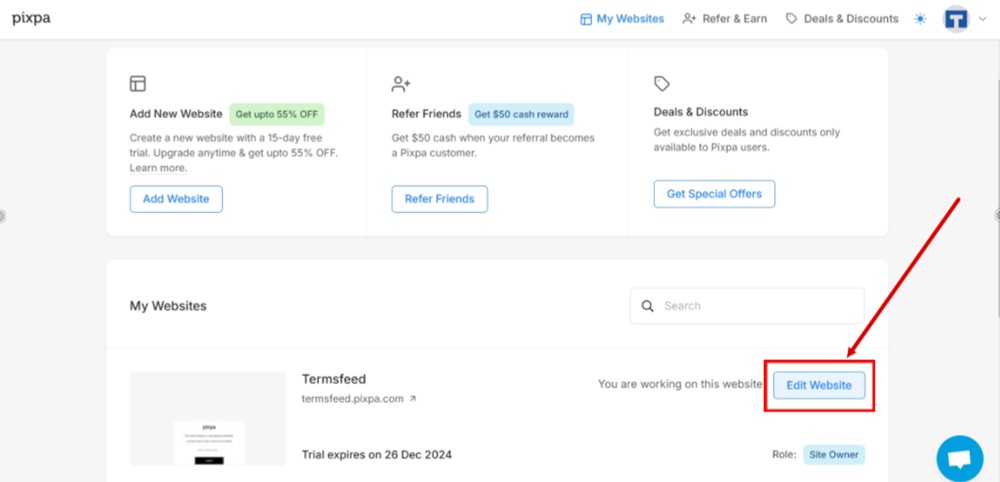
Log in to your Pixpa account and go to Edit Website:
-
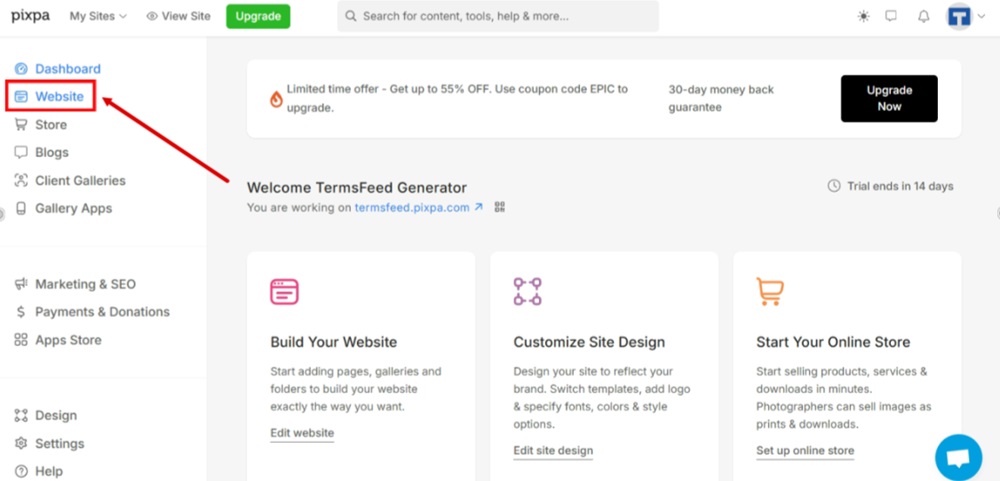
From the dashboard, go to Website:
-
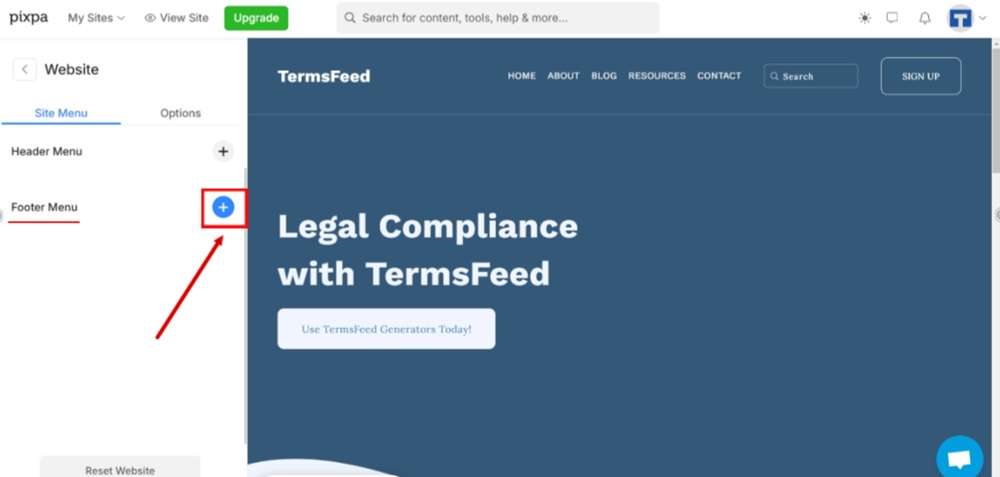
Click the Plus icon from the Footer Menu to add a new page:
-
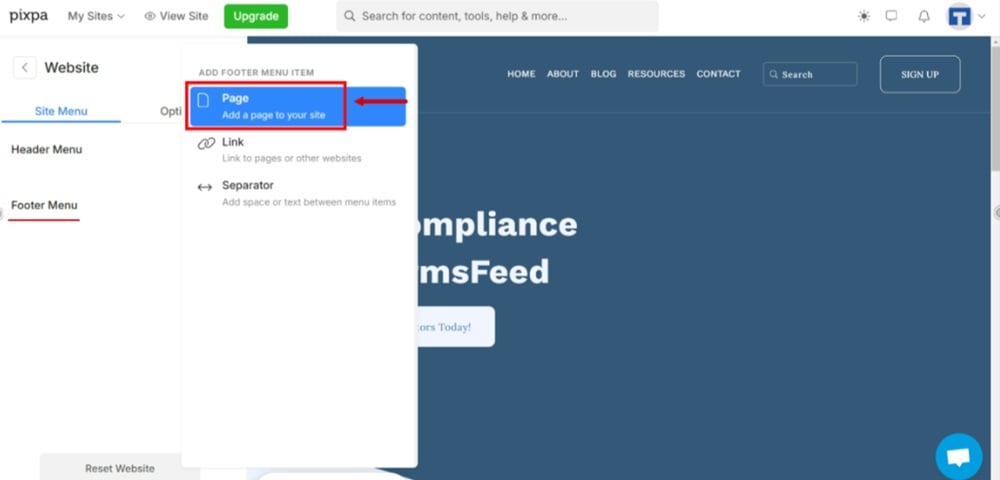
Select Page to add:
-
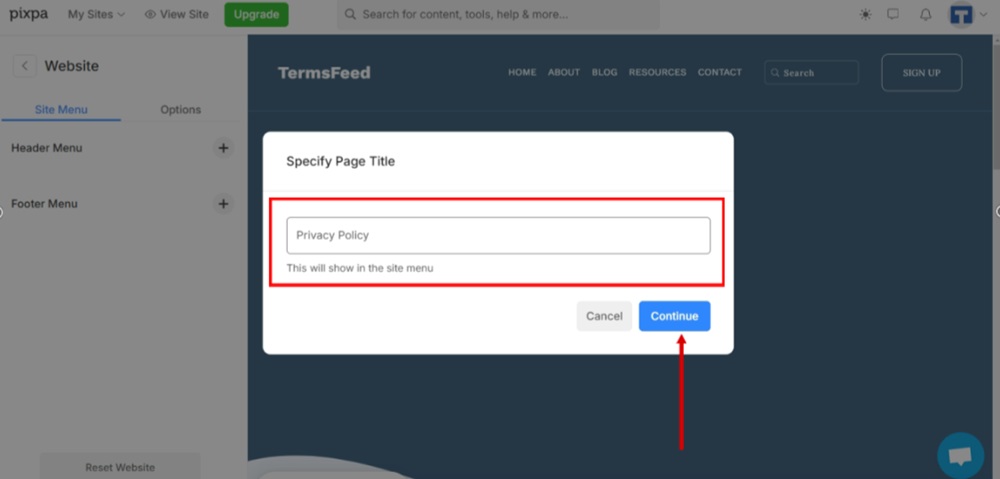
Name your page "Privacy Policy" and click Continue in the new window:
-
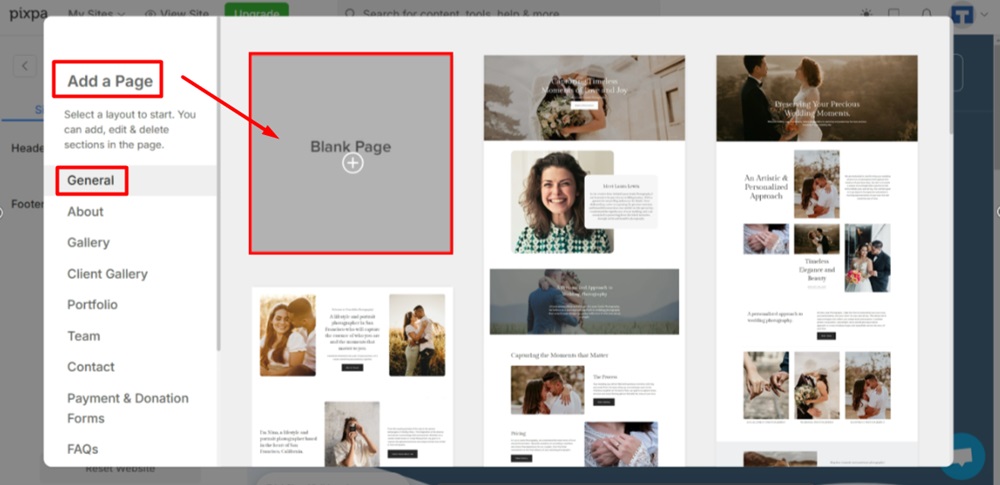
Select Blank Page from the second window:
-
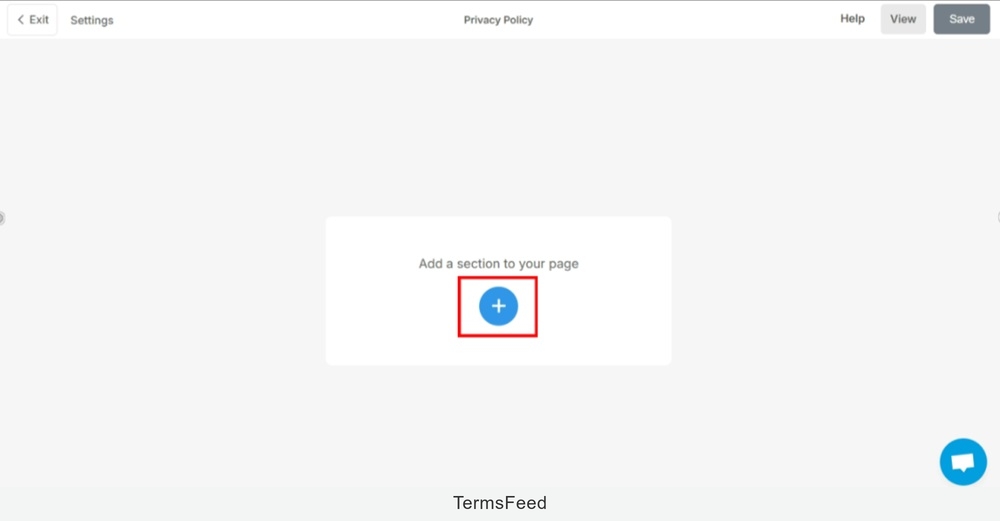
Click the Plus icon to add a section to your page:
-
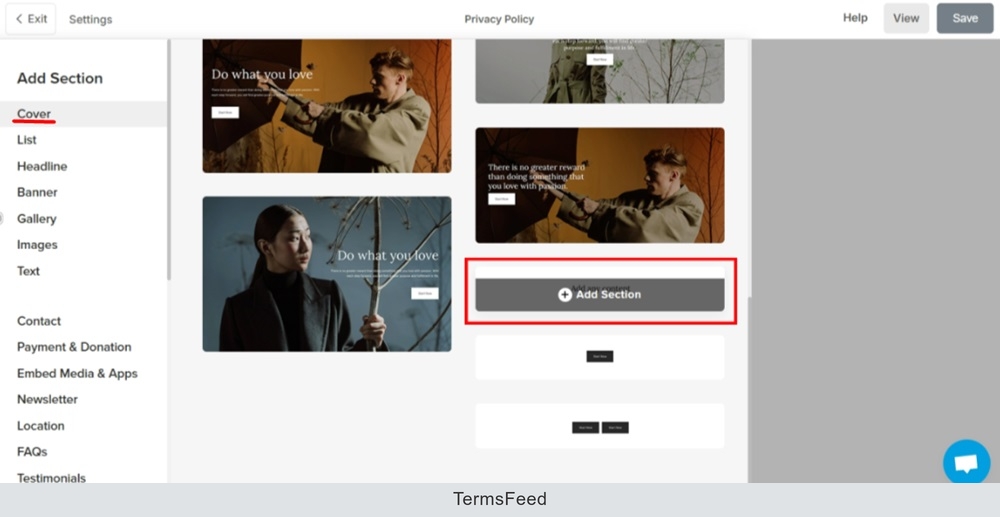
Select a section. For example, we've added the "Add any content" section:
-
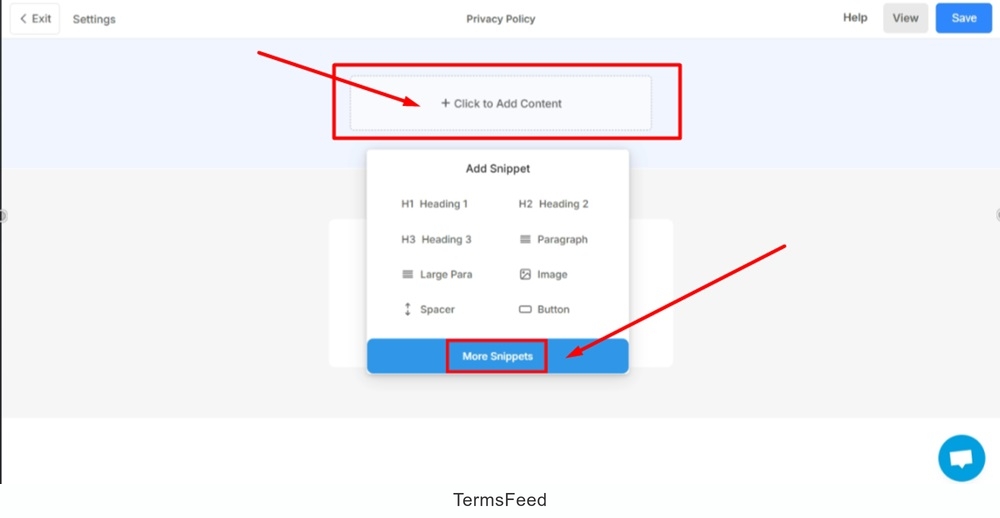
Click in the section field. Select More Snippets option:
-
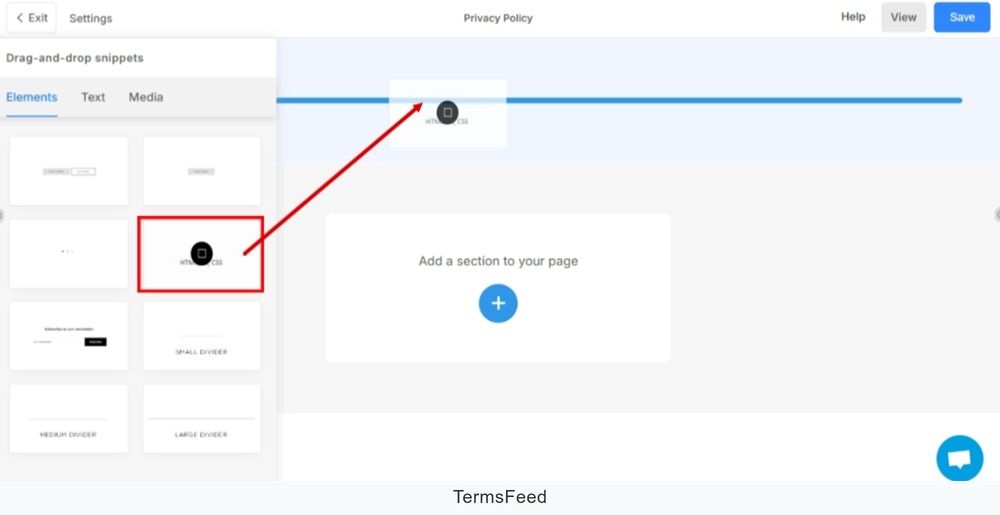
Drag and drop HTML, JS, CSS element to the page section:
-
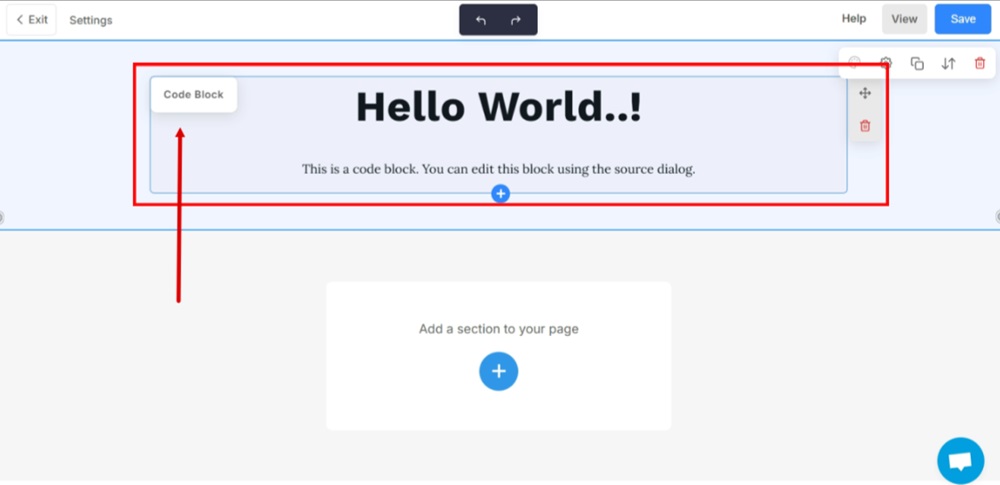
Click the "Code Block" to add your HTML code to the section:
-
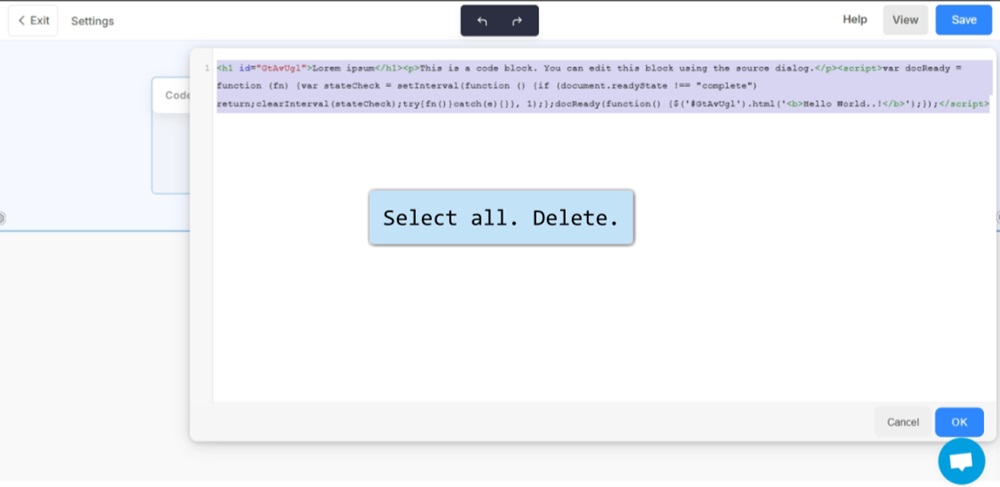
The new code block window opens. Select all existing code and delete it.
-
Add your Privacy Policy HTML code.
If you do not have a Privacy Policy, you can use our Privacy Policy Generator and create it within minutes.
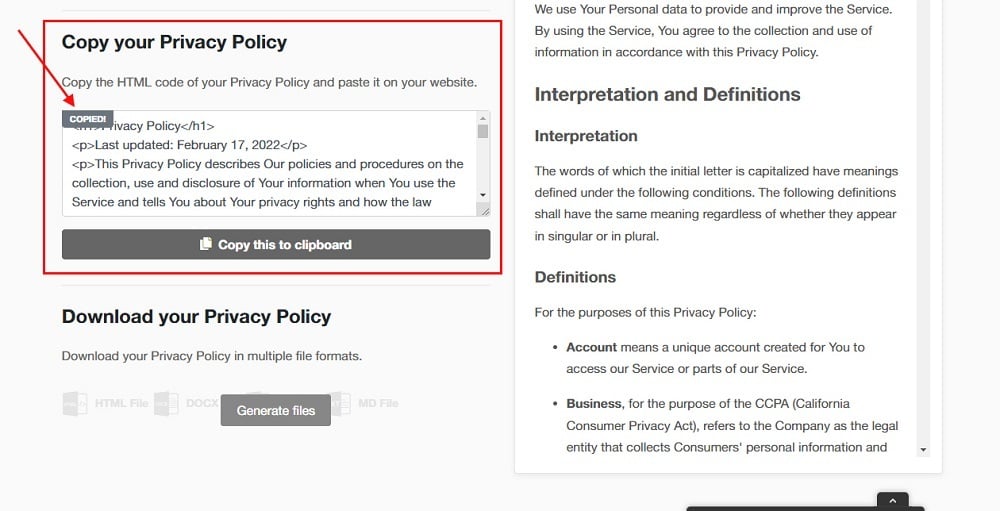
Once you have the Privacy Policy created by TermsFeed, let's get the policy text. Under the Copy your Privacy Policy section, click on Copy this to clipboard:
-
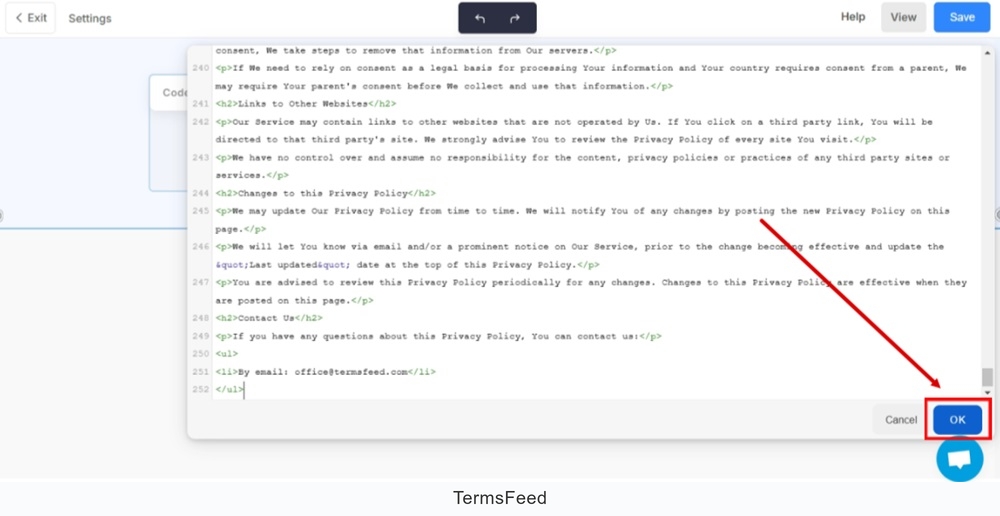
Paste the code and click OK at the right bottom end of the code block window:
-
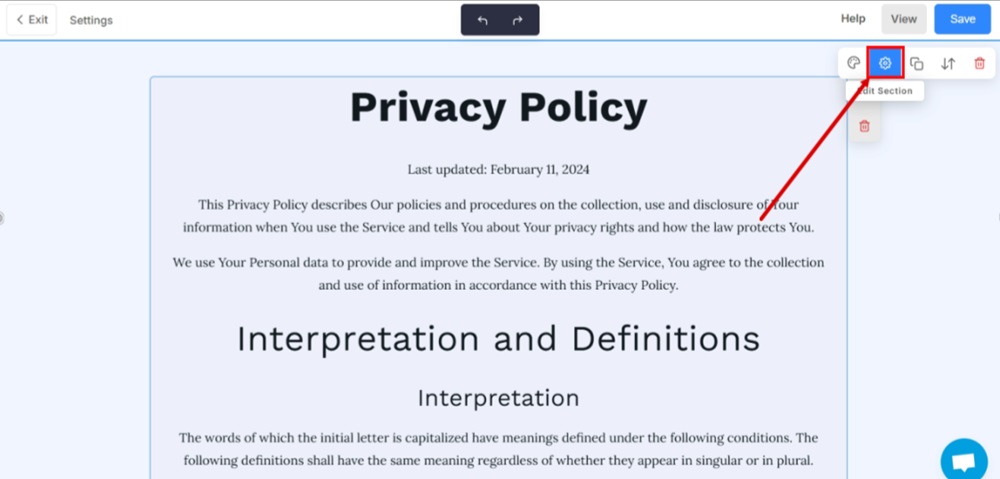
Go to the Gear icon to adjust the section snippet element settings:
-
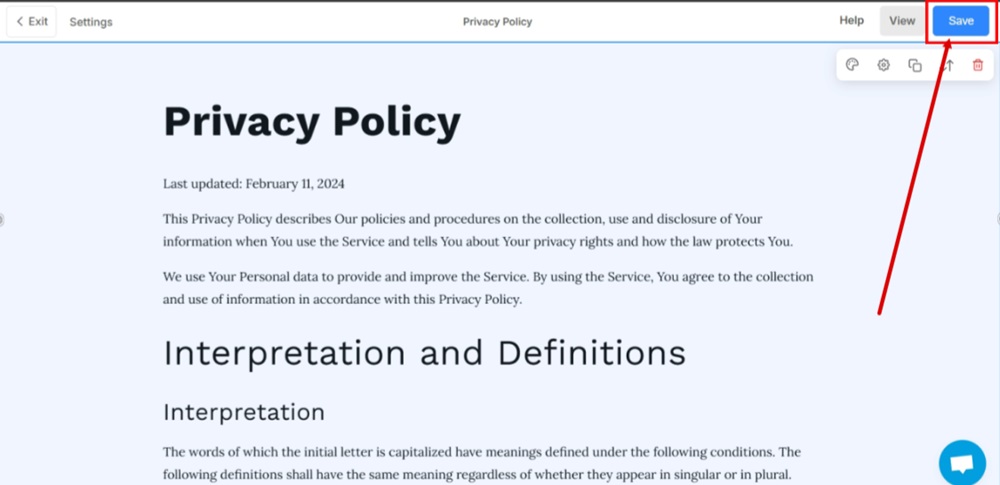
Click Save:
-
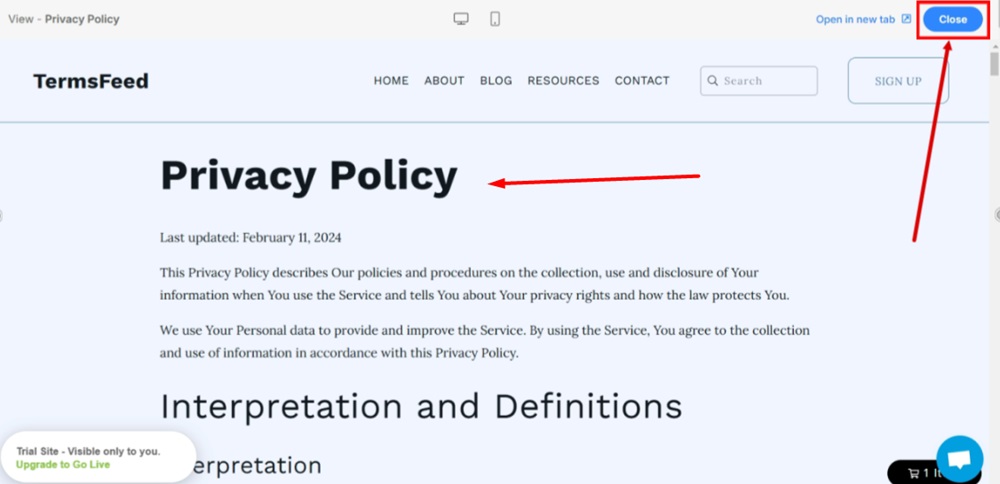
Use the View option to see the page. Close the Privacy Policy page preview:
-
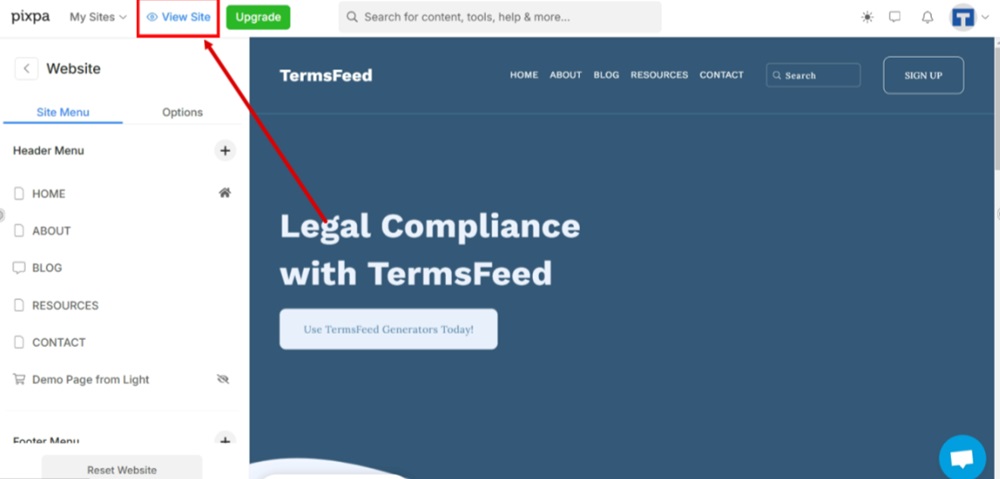
Use the Exit option to get back to the website options. Go to the View Site from the top menu to see changes:
-
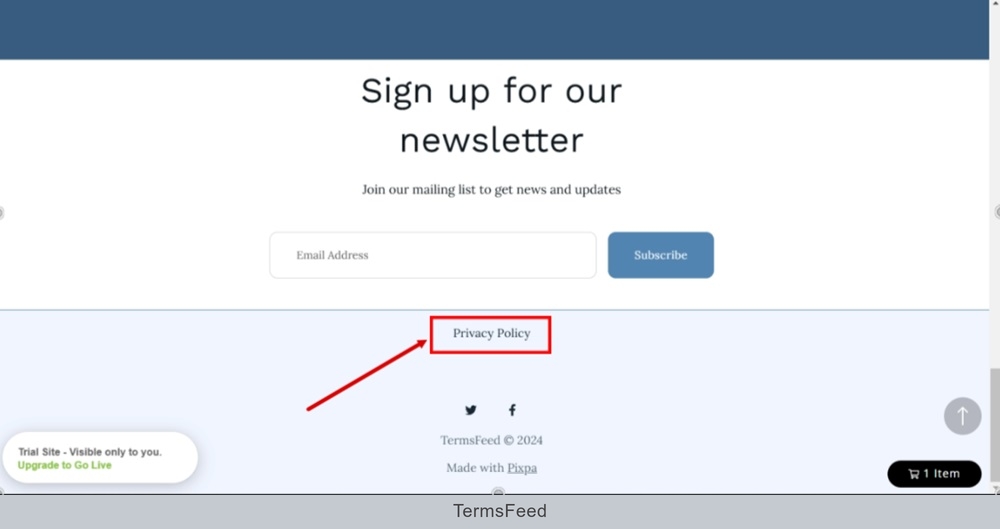
The Privacy Policy page is linked and displayed at the footer section of your Pixpa website: